Request changes to an existing TRE project
Project leads can use the TRE Project Management Hub to request URL whitelisting, additional software or changes to a user's access. You can combine these changes in a single request for the same project.
Sign in and select a project
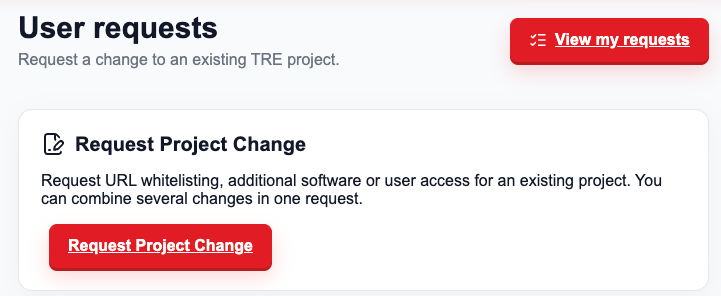
- Open User requests in the TRE Project Management Hub and sign in with your King's account.
- Select Request Project Change.
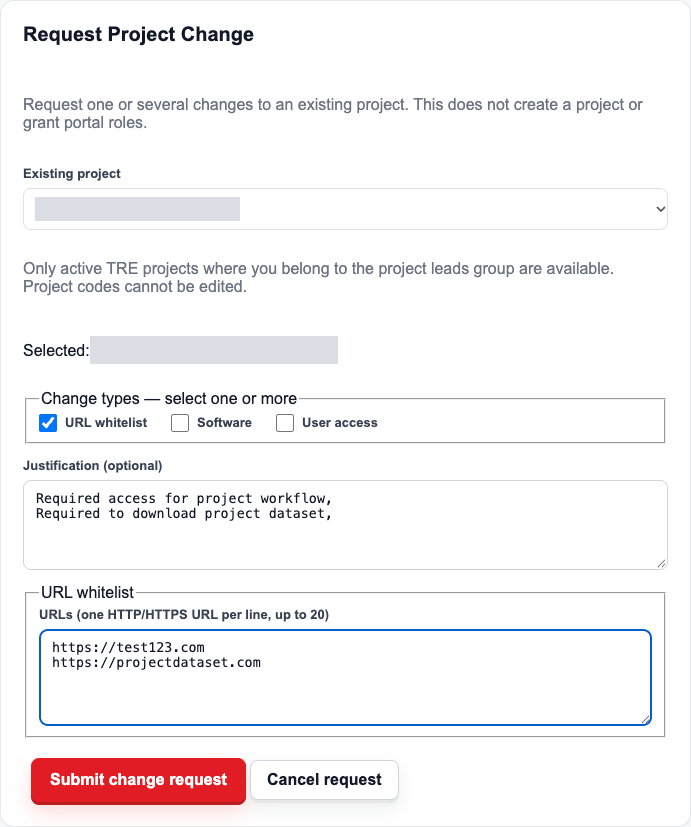
- Under Existing project, select the project you want to change. The list shows active TRE projects whose project leads group includes your King's account. The portal selects the project automatically if only one is available.
- Select one or more Change types and complete the sections that appear. In Justification (optional), you can explain why the project needs the changes.
Request URL whitelisting
- Select URL whitelist under Change types.
- Enter one URL starting with
https://per line. You can include up to 20 URLs. Leave out embedded usernames, passwords and fragments beginning with#. - If you add a Justification, explain what the sites are needed for, such as downloading a dataset for the project.
Request additional software
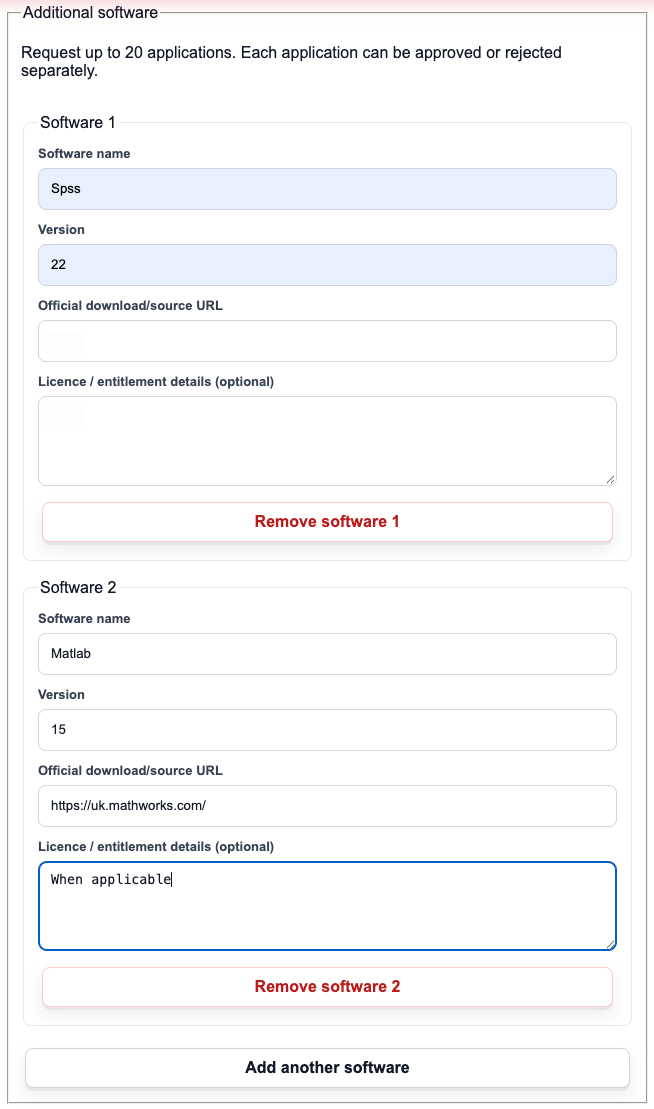
- Select Software under Change types.
- Enter the Software name. Add the Version if you need a specific release.
- Enter a valid link in Official download/source URL, if available.
- Add Licence / entitlement details if relevant, for example how the project is licensed to use the software.
- Select Add another software for each additional application. You can include up to 20 applications. Each can be approved or rejected separately.
Request user access
Select User access under Change types to add a user or change the permissions of an existing member. Each request covers one user.
Add a user
Verify the King's account
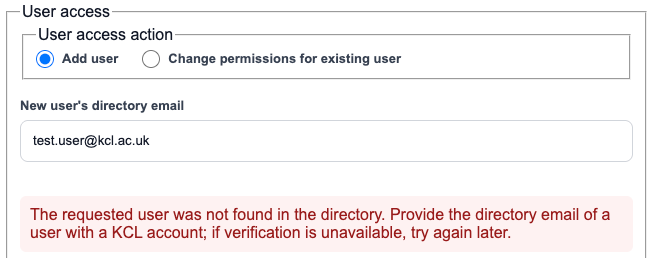
- Under User access action, select Add user.
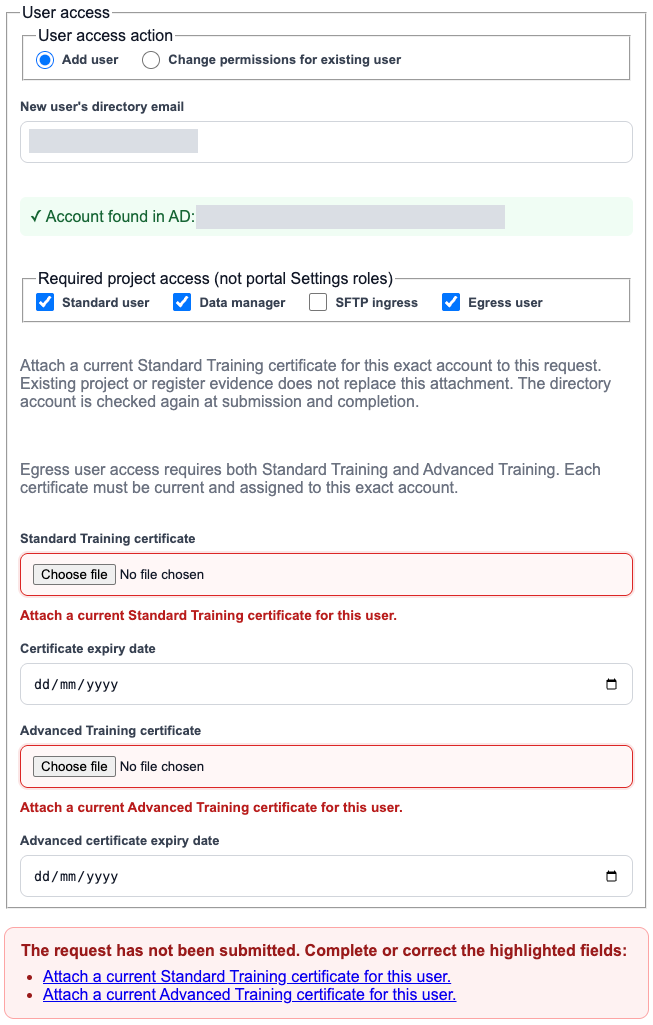
- Enter the user's King's directory email address in New user's directory email. The portal checks for the account in King's Active Directory (AD).
- Wait for Account found in AD. If the portal reports that the user was not found, check the address. The user needs a King's account before you can submit the request.
Select access and attach training certificates
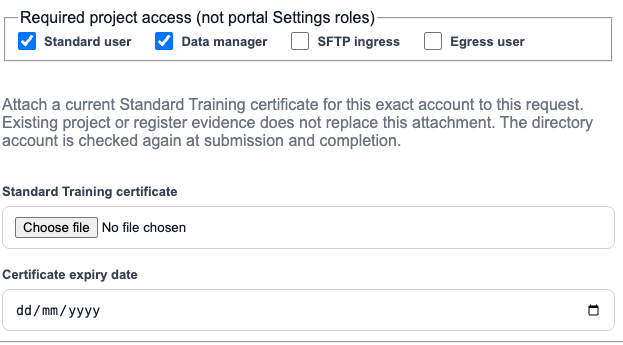
- Select the roles the user needs under Required project access.
- Attach a current Standard Training certificate for that account and enter the Certificate expiry date. The certificate from All users training is valid for 12 months.
- If you select Egress user, upload a screenshot of the email showing the confirmation message “You have successfully passed the Online Assessment for the Safe Researcher Training course”. Attach it under Advanced Training certificate and enter the Advanced certificate expiry date. This certificate is valid for three years.
- Upload the required certificates with the request even if they are already held in the training register. Both training links are in Step 4 of the TRE onboarding process.
The portal checks the account and training separately. When the green Account found in AD message appears alongside certificate errors, attach the certificates marked in red and enter their expiry dates before submitting again.
Change permissions for an existing user
- Under User access action, select Change permissions for existing user.
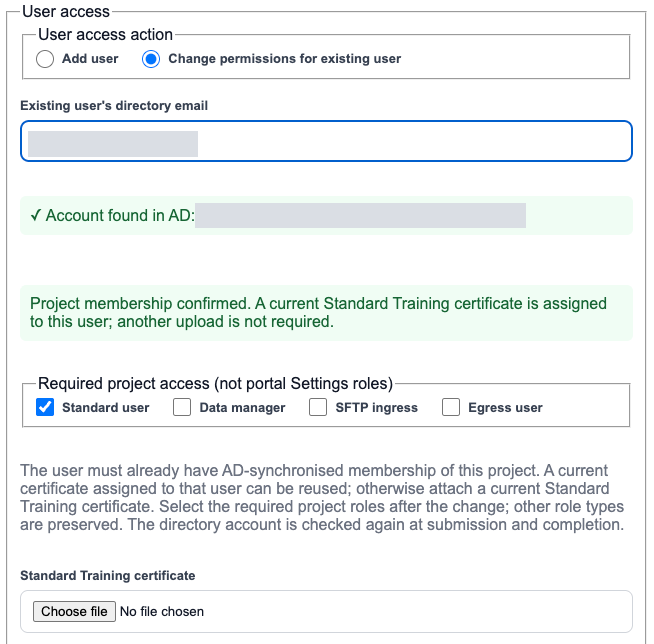
- Enter the user's King's directory email address. The portal checks both the account and its membership of the selected project. If the portal says the user is not a member of this project, use Add user.
- Wait for Project membership confirmed, then select all the roles the user should have after the change, including any they should keep.
- The portal can reuse a current Standard Training certificate already assigned to this user. If it asks for a certificate, attach it and enter the expiry date. If you select Egress user, the same check applies to the Advanced Training certificate.
Submit the request
- Review the selected project and all the requested changes.
- Select Submit change request at the bottom of the form. If the portal highlights any fields in red, correct them and submit again.
- Look for the submission confirmation and request reference on the User requests page.
Track your request and revise rejected items
- On User requests, select View my requests. In Project Change Requests, use the project, change type or status filters to find a request. You can also search by reference.
- Check the Status column and select Open to see the details and review decisions. Approved (partial approval) means some items were approved and others were rejected.
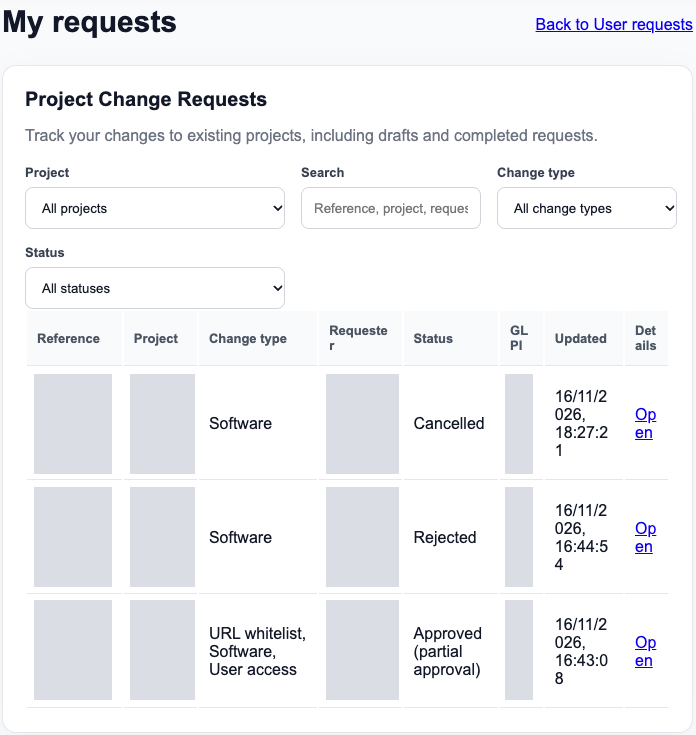
If your request was rejected in full or in part, open it and read the reasons for the rejected items. Select Revise rejected items to open a new request prefilled with the rejected items. Make the changes, attach any certificates required for the new request and select Submit change request. The revised request goes through a new review.
For help with project change requests, contact ARC support.