CREATE TRE Guides 
Table of Contents
- Table of Contents
- CREATE TRE Egress Portal Guide
- 1. Accessing the Egress App
- 2. Egress Request Process
- 3. Egress Approval and Rejection Process
- 4. Access Logs
- CREATE TRE Ingress SSH/SFTP Guide
- 1. Obtaining an SSH Key
- 1.1 Windows
- 1.2 macOS and Linux
- 2. Installing SFTP Clients
- 2.1 Windows
- 2.2 macOS
- 2.3 Linux
- Note
CREATE TRE Egress Portal Guide
1. Accessing the Egress App
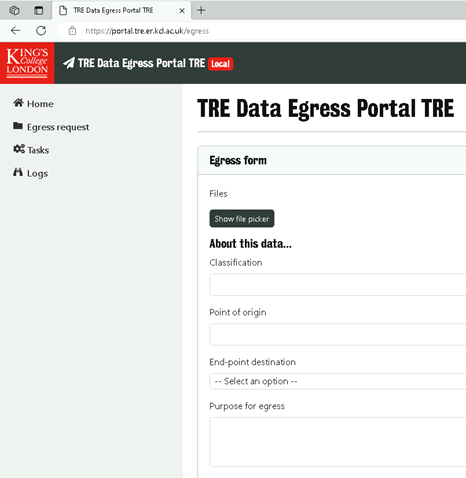
To request data egress please access any of the researcher's VMs associated with your project and click on the “Data_Egress_Request” icon.
2. Egress Request Process
-
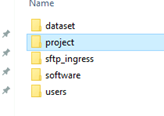
Copy the files you intend to egress to the project directory on your TRE project Virtual Desktop.
-
Launch the app and click on Show File Picker to select the desired file.

-
Complete the About this data… section providing all necessary details and then hit Submit Request.
-
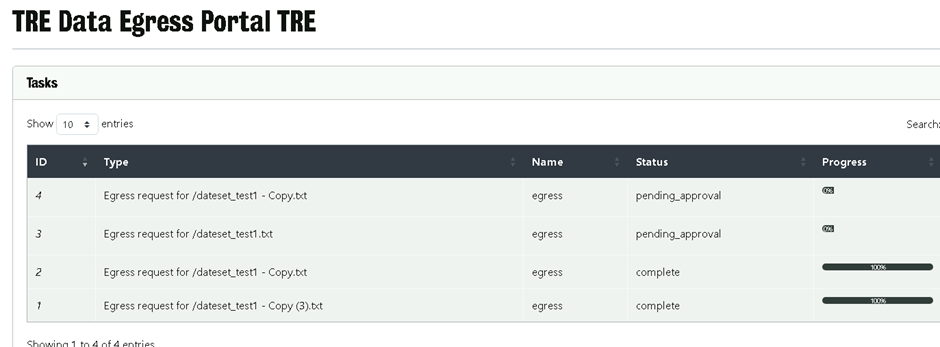
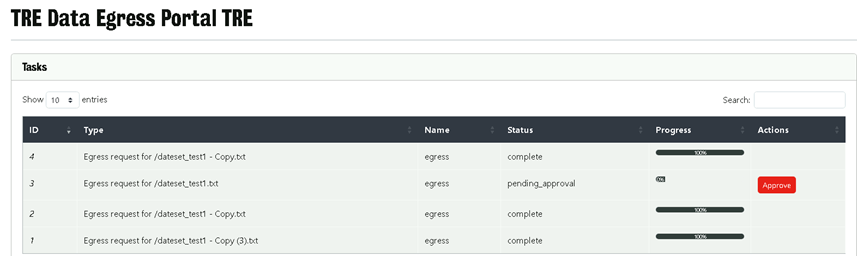
Now you can see the progress and status of the egress request.
3. Egress Approval and Rejection Process
-
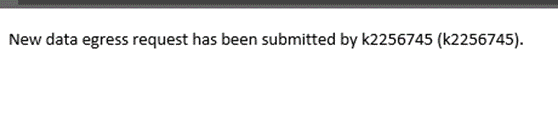
The egress authority group members will receive an email notification of the new data egress request.
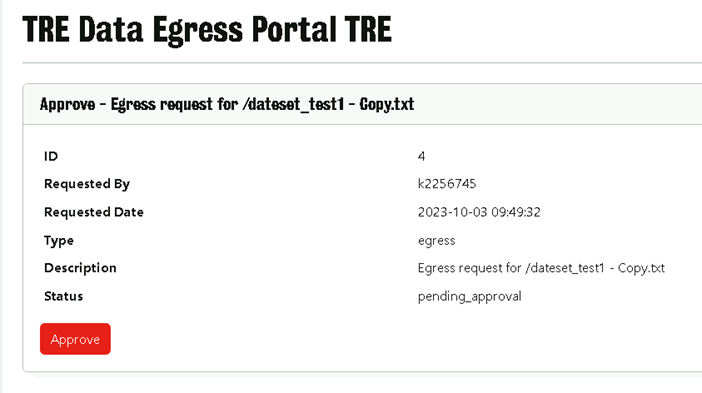
-
Log in to the TRE project, launch the Egress App, and under the tasks tab a list of egress requests along with an Approve/Reject button will be displayed.

-
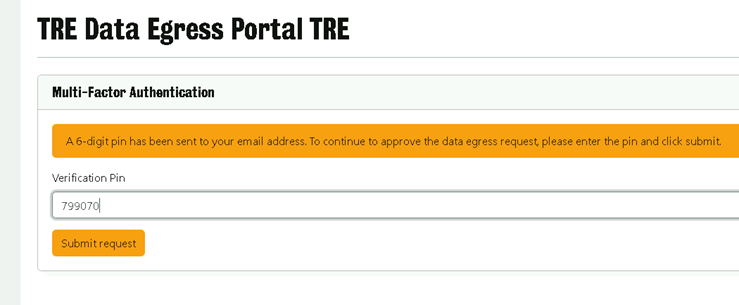
Review the egress requested file!. If it meets the criteria, Approve it, or Reject it with comments. An email containing a Verification Pin valid for 15 minutes will be sent to the egress authority group members.
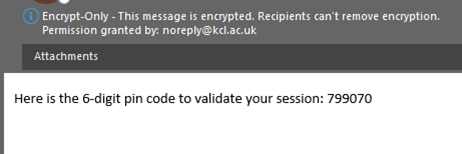
-
Verify the pin to confirm approval.
-
The egress status will change to Complete.
-
The user who requested the egress will receive a confirmation email.
-
The egressed file will be copied to the RDS share accessible outside the TRE project
\\rds.er.kcl.ac.uk\tre\***_***** (for example if project name is er_tre_abc_abcde egress directory will be \\rds.er.kcl.ac.uk\tre\abc_abcde). All project members can access RDS share directory. Instructions for mounting RDS can be found in Connecting to RDS ocumentation.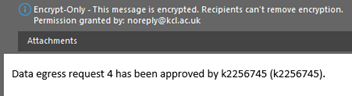

4. Access Logs
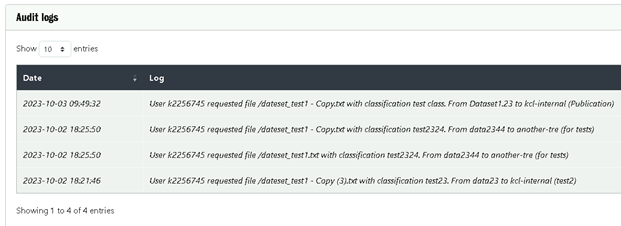
- Navigate to the Logs tab. Here you'll find the Audit logs containing detailed records of all egress requests offering transparency and traceability.
Thank you for taking the time to review this guide. We are committed to ensuring that you have a smooth and efficient experience. In case of any challenges, uncertainties, or issues encountered while following this guide do not hesitate to reach out for support. For immediate assistance please contact:
- Email: michal.rosiek@kcl.ac.uk
- Support Team Email: support@er.kcl.ac.uk
CREATE TRE Ingress SSH/SFTP Guide
To ingress data into your TRE, you will need to transfer the data using an SFTP client.
Uploaded files are automatically virus scanned, then moved into your TRE.
They will be available in the storage/sftp_ingress/ directory.
This directory is only accessible to users who members of the project's "data_ingress" group.
Once the files are available, they should be copied into a location that is accessible to other users, such as storage/dataset/ or storage/project/.
In order to transfer data via SFTP, you will need an SFTP service account. The first step in obtaining an SFTP service account is to create an SSH key pair for authentication. This step, along with the following transfer process, is described below.
1. Obtaining an SSH Key
1.1 Windows
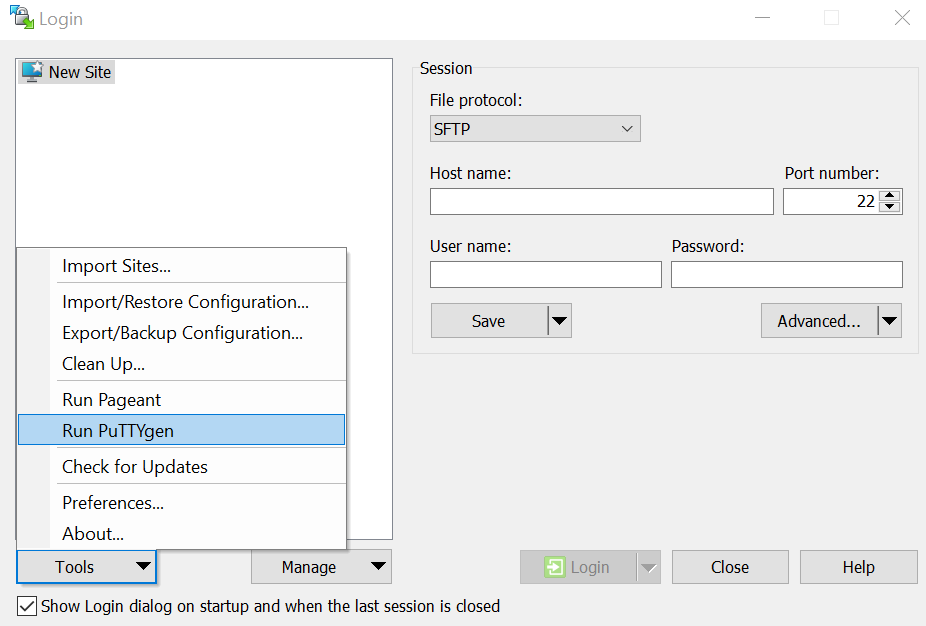
- To generate an SSH key on Windows, use WinSCP which includes PuTTYgen:
-
Download WinSCP from https://winscp.net/eng/download.php, for KCL laptops you can find it in the software centre.
-
Install WinSCP, including PuTTYgen.
-
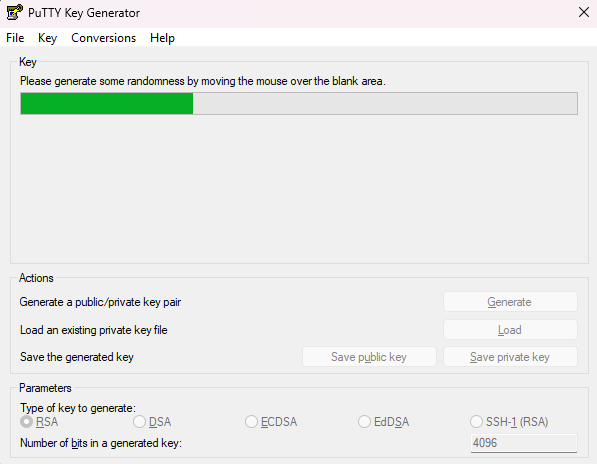
Launch PuTTYgen from the Start menu or WinSCP tools.
-
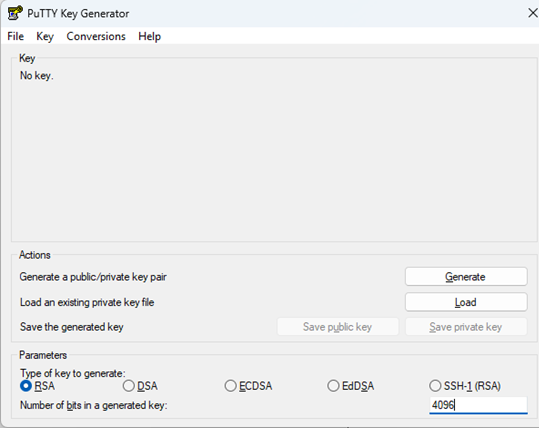
Click Generate and move your mouse over the blank area.
-
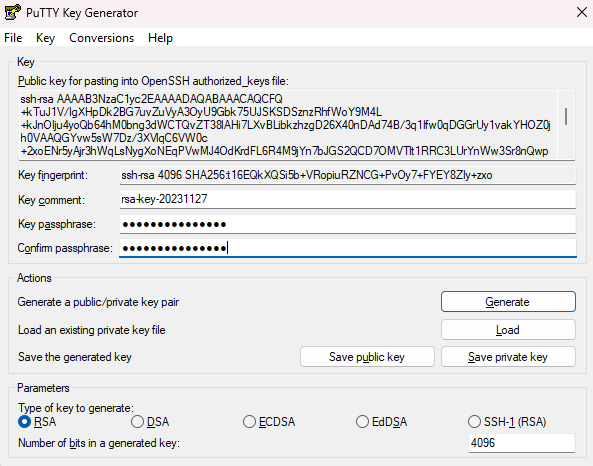
Create and save a passphrase for your keys!.
-
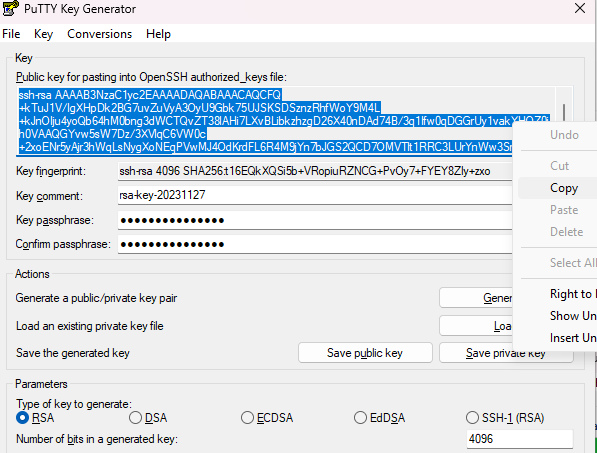
Save the public and private keys!.
-
Share the public key with us via email support@er.kcl.ac.uk including your TRE project name.
Warning
Only share your PUBLIC key. Never share your PRIVATE key with anyone!
1.2 macOS and Linux
- To generate an SSH key on macOS and Linux, use Terminal:
-
Open Terminal.
-
Run
ssh-keygen -t rsa -b 4096. -
Accept the default file location or specify a different one.
-
Enter a passphrase for your SSH key!.
-
The SSH keys will be saved in the specified or default
~/.sshdirectory.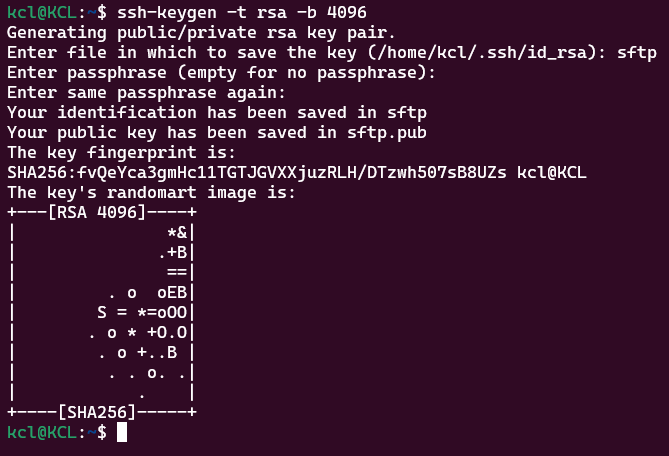
-
Share your public key by running
cat ~/.ssh/id_rsa.puband email it to us (support@er.kcl.ac.uk) with your TRE project name.
Warning
Only share your PUBLIC key. Never share your PRIVATE key with anyone!
2. Installing SFTP Clients
2.1 Windows
- Use WinSCP as an SFTP client:
-
Launch WinSCP and open the Login dialog.
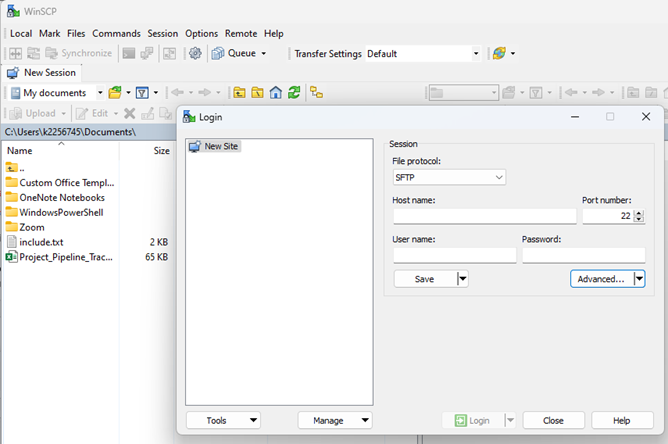
-
Fill in the Host name
tre-sftp.er.kcl.ac.uk -
Fill User name (this will be provided).
-
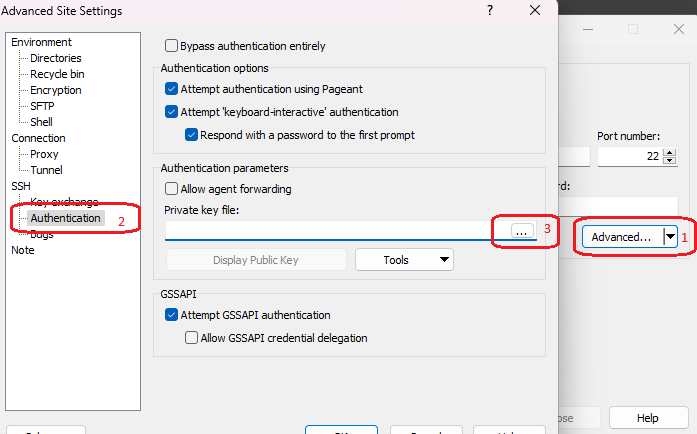
Click Advanced... and go to SSH > Authentication.
-
Select ... and navigate to your private key file.
-
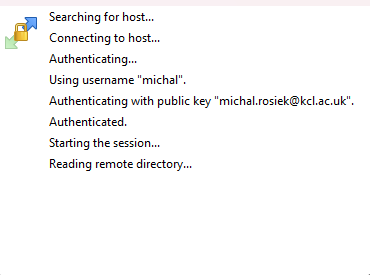
Click Login to start the SFTP session.
2.2 macOS
- Install Cyberduck for macOS:
-
Download Cyberduck from https://cyberduck.io/download/.
-
Install Cyberduck and open it.
-
Click Open Connection and select SFTP.
-
Enter the server details and select your private key.
2.3 Linux
- Use the built-in SFTP client in Terminal:
-
Open Terminal.
-
Run
sftp -i /path/to/private_key user@hostname. -
Replace the placeholders with your private key path, username, and hostname.
-
Use commands like
get,put, and to view current contentlsto transfer files.
Note
- The private key file provided here should match the public key you've previously sent for access setup.
- We can incorporate an additional layer of security to the SFTP account by specifying the source IP address if required.
| Document owner | ResOps |
|---|---|
| Review signoff | TRE/ResOps Lead |
| Review frequency | Annual |
| Last review date | 6/5/26 |
| Reviewed build | d7829d9 |