Setting up a Virtual Machine (VM or instance)
Attention
- A Portal project registered with a cloud project activated is required; for details see CREATE Cloud Get Started.
- Make sure you are working in the project you want your instance to be created in (the project can be selected at the top left of the page)
Create a key pair
Configuring an (SSH) Key Pair in OpenStack allows the public key of the pair to be automatically installed on to instances (virtual machines) as part of the build process.
Keys created in OpenStack cannot have passwords attached to them so we strongly recommend following the guidance on creating keys in SSH Clients and Keys and importing the public key to OpenStack during the configuration process.
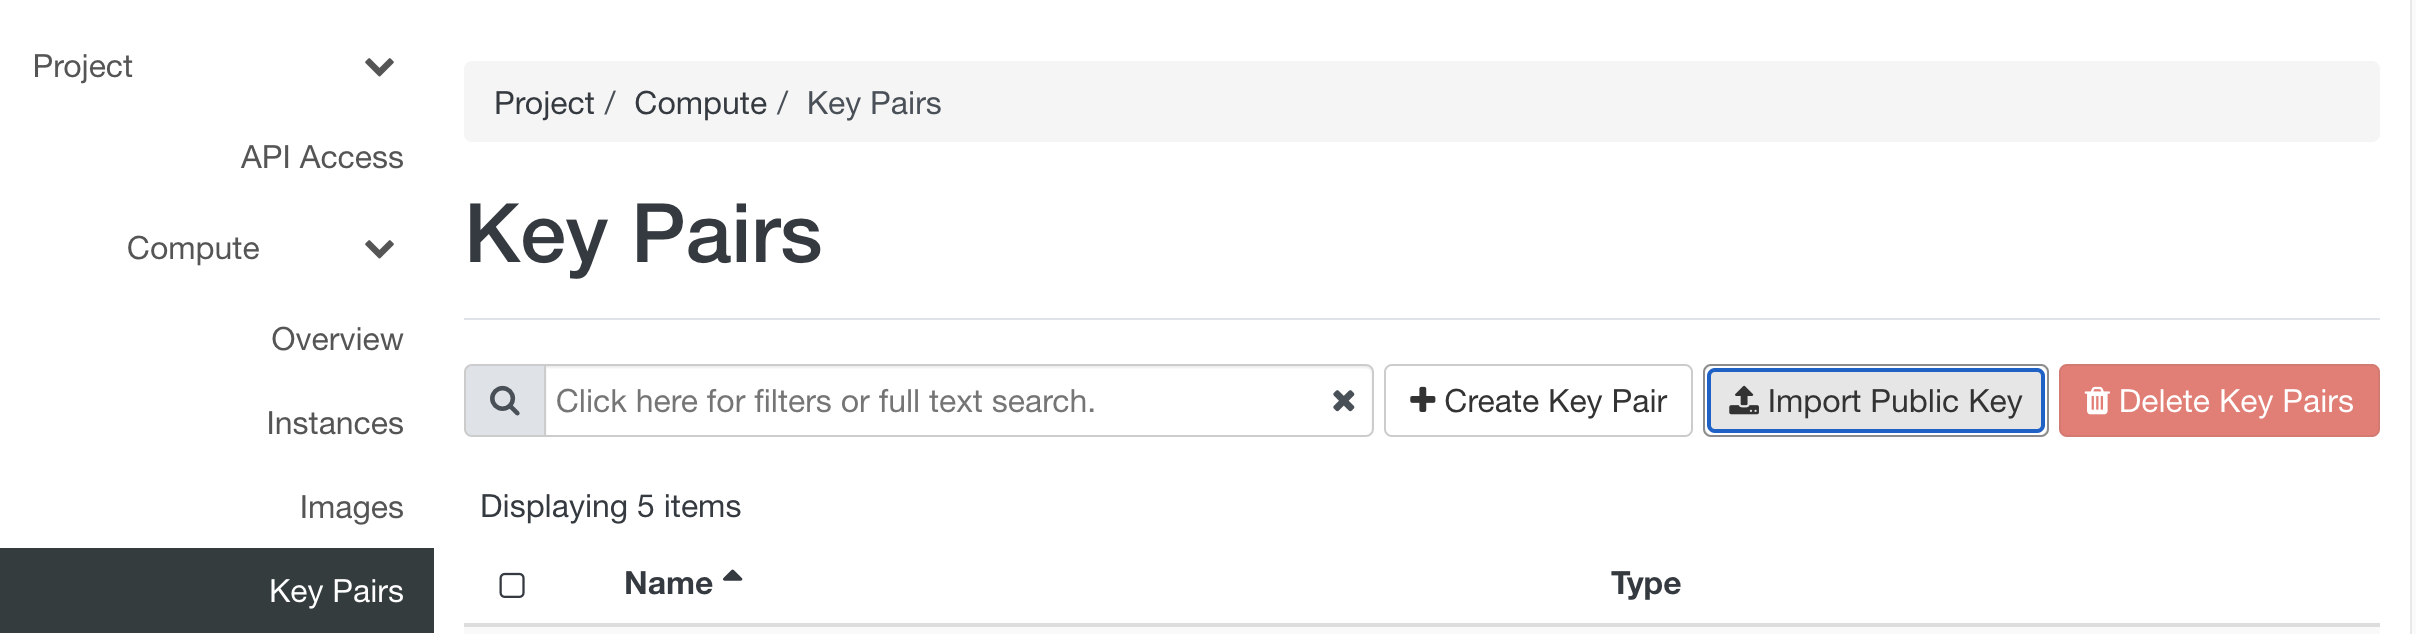
Select 'Key Pairs' from the main menu in the 'Compute' section and click 'Import Public Key'. Enter a meaningful name e.g. 'KCL laptop key'. If teh previous giudance was used the Key Type will be "SSH Key".
Launch an instance
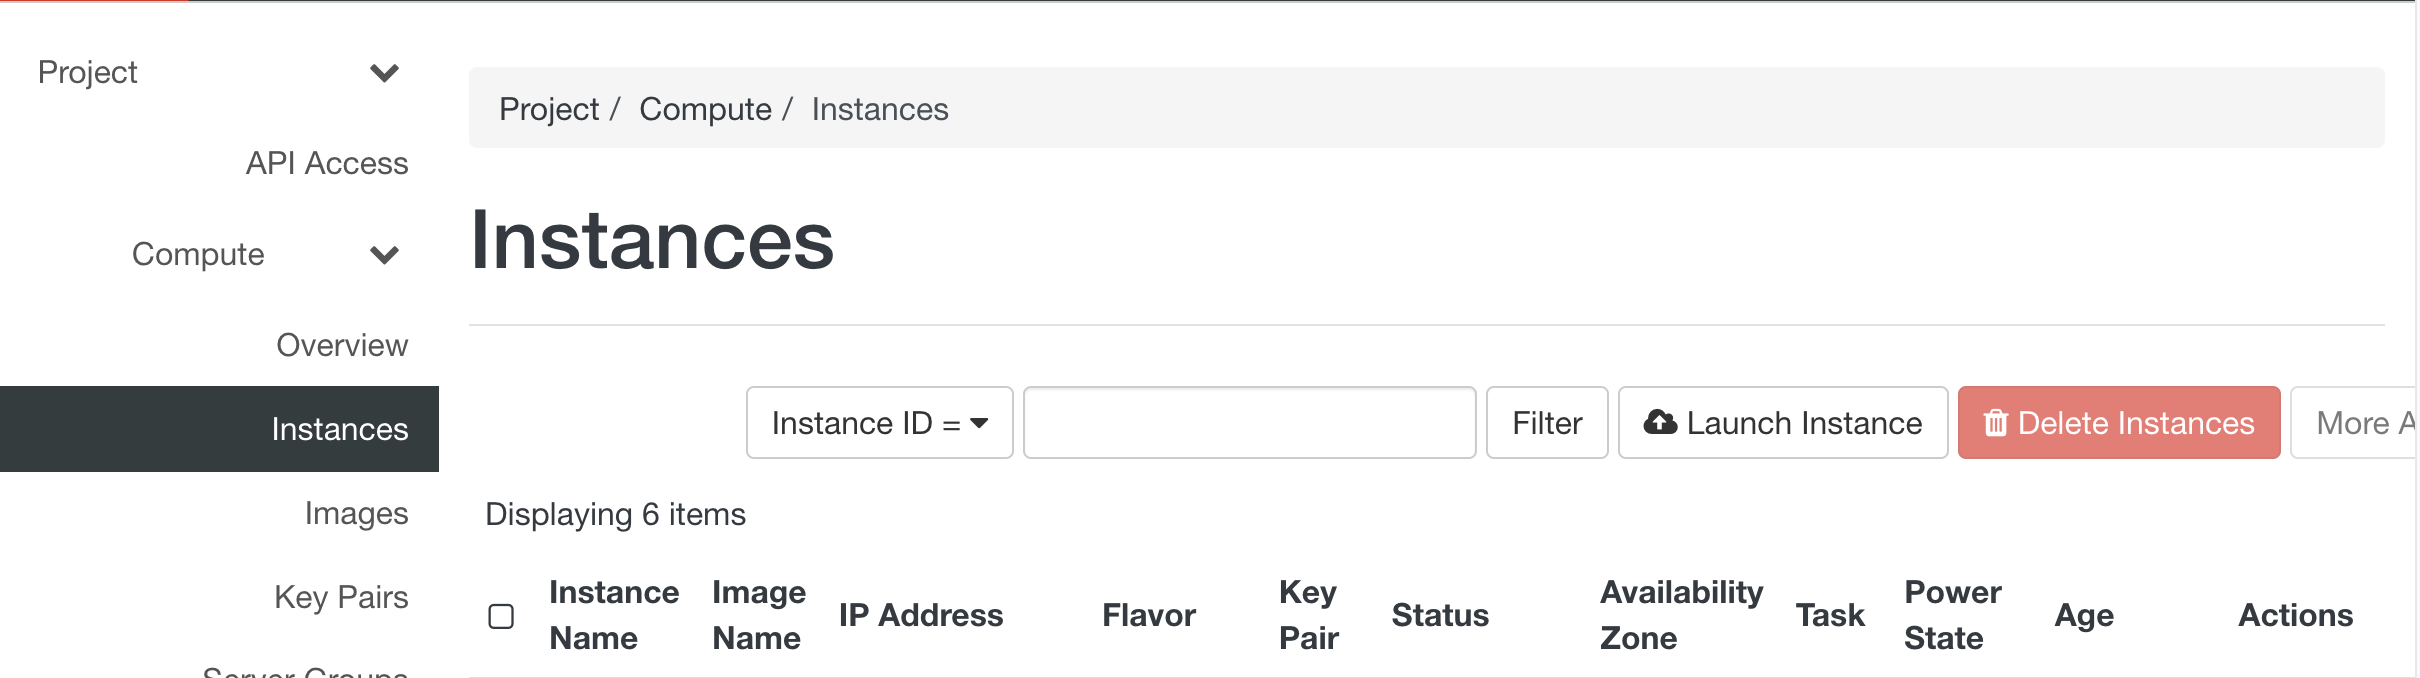
To create a virtual machine (VM) select 'Instances' from the main menu in the 'Compute' section and press the button 'Launch Instance'.
Details - Instance Name
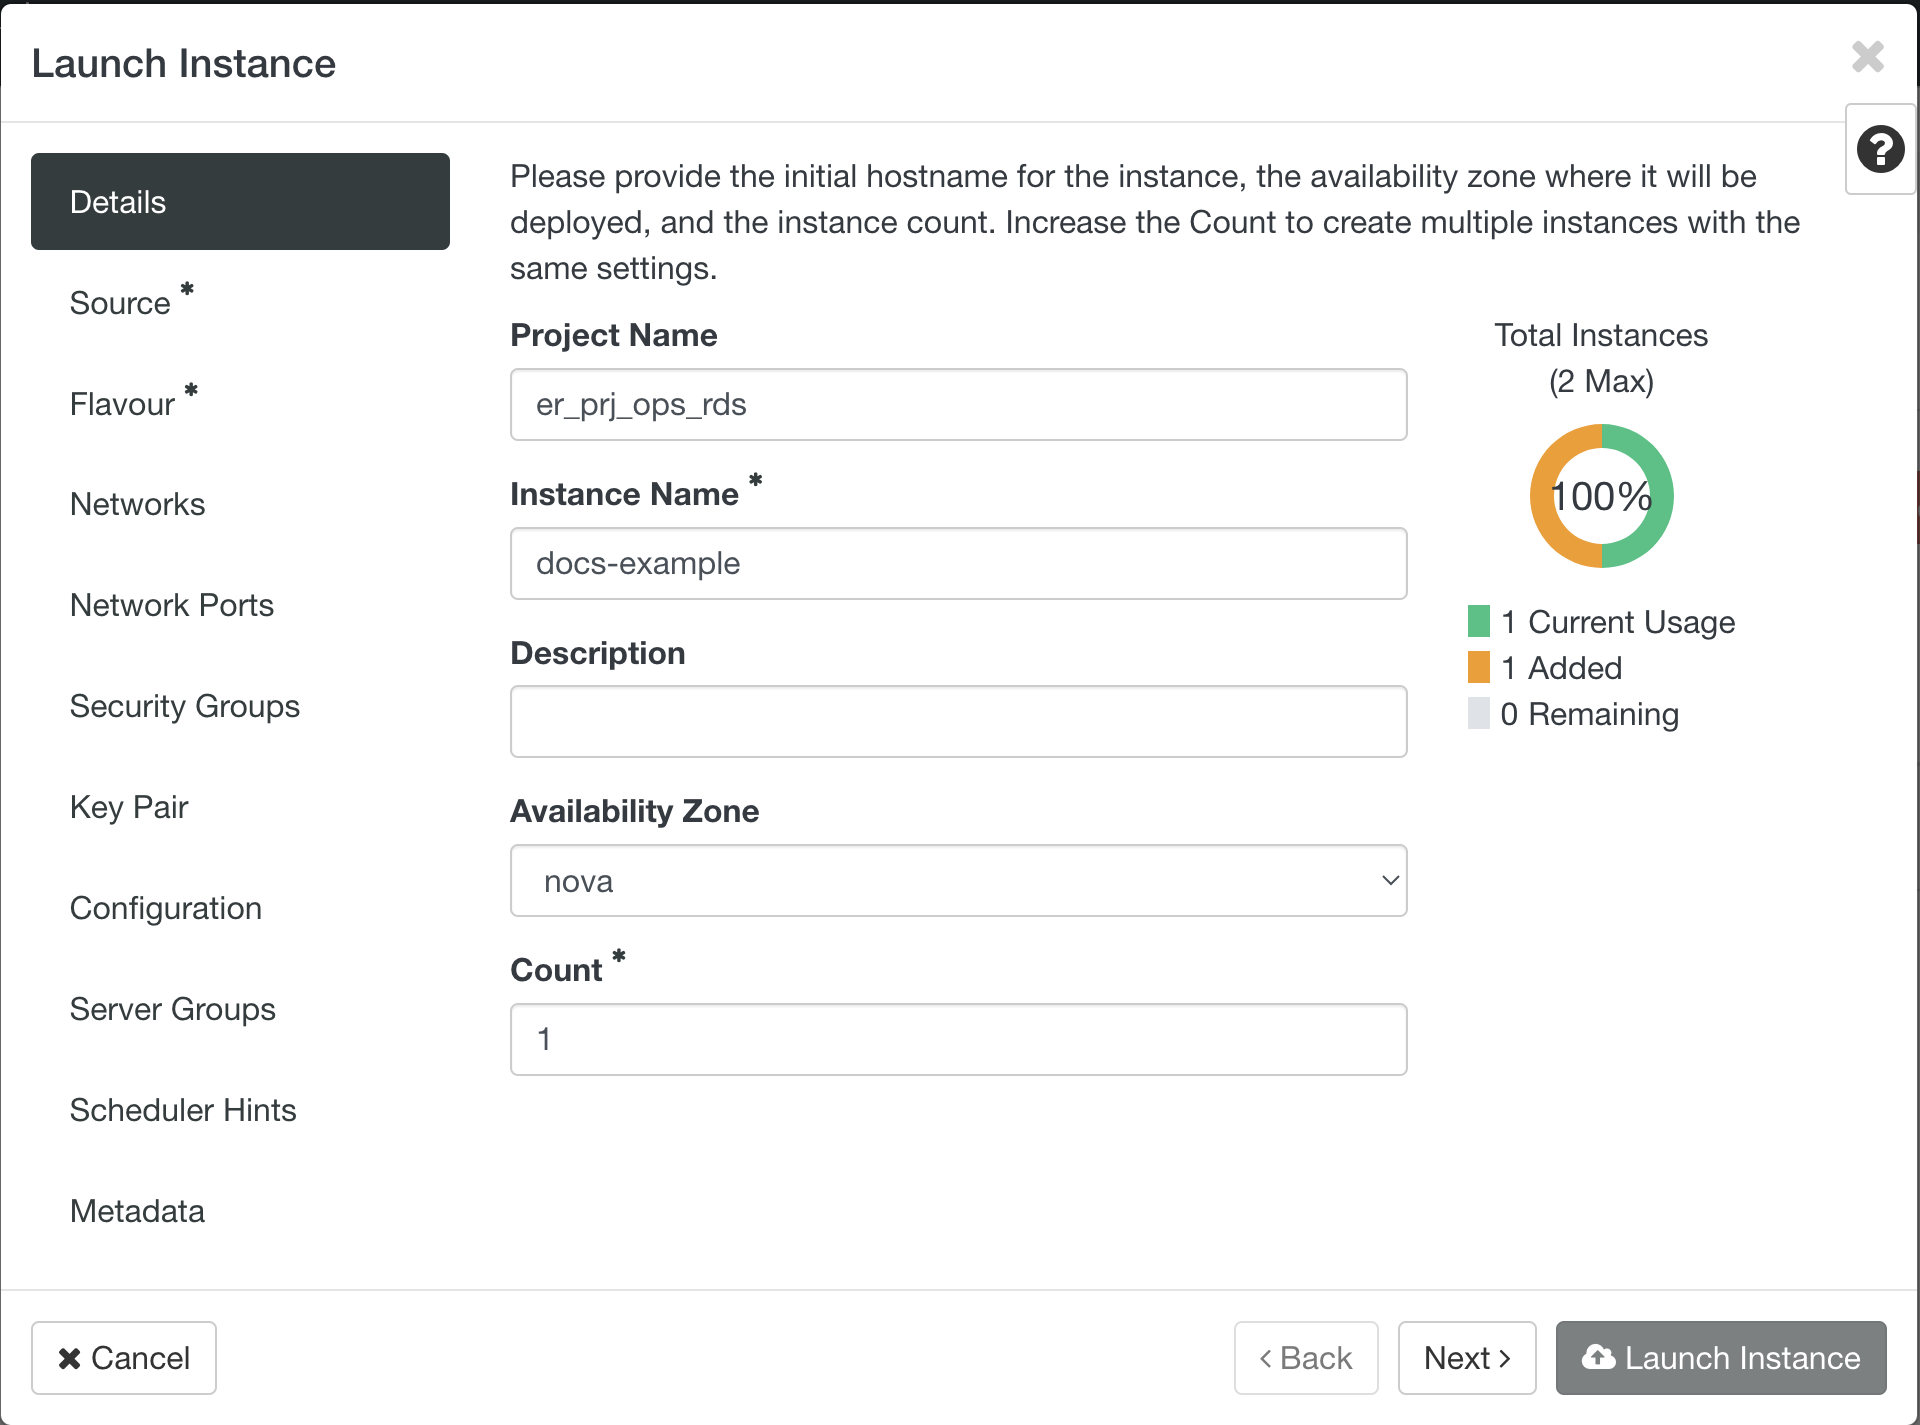
Every instance must have a unique "Instance Name", if you want to create multiple identical VMs, the "Count" can be increased and this will append a number in series, starting at 1, to the instance name.
Source
When creating your first VM you will want to choose a source, available sources are listed at the bottom of the dialogue box when 'Source' is selected.
We currently provide a standard Ubuntu 20.04 image if your project requires another flavour of Linux or Windows please get in touch to discuss your requirements.
To Allocate the source image click the up arrow to the right of the required source in the "Available" section.
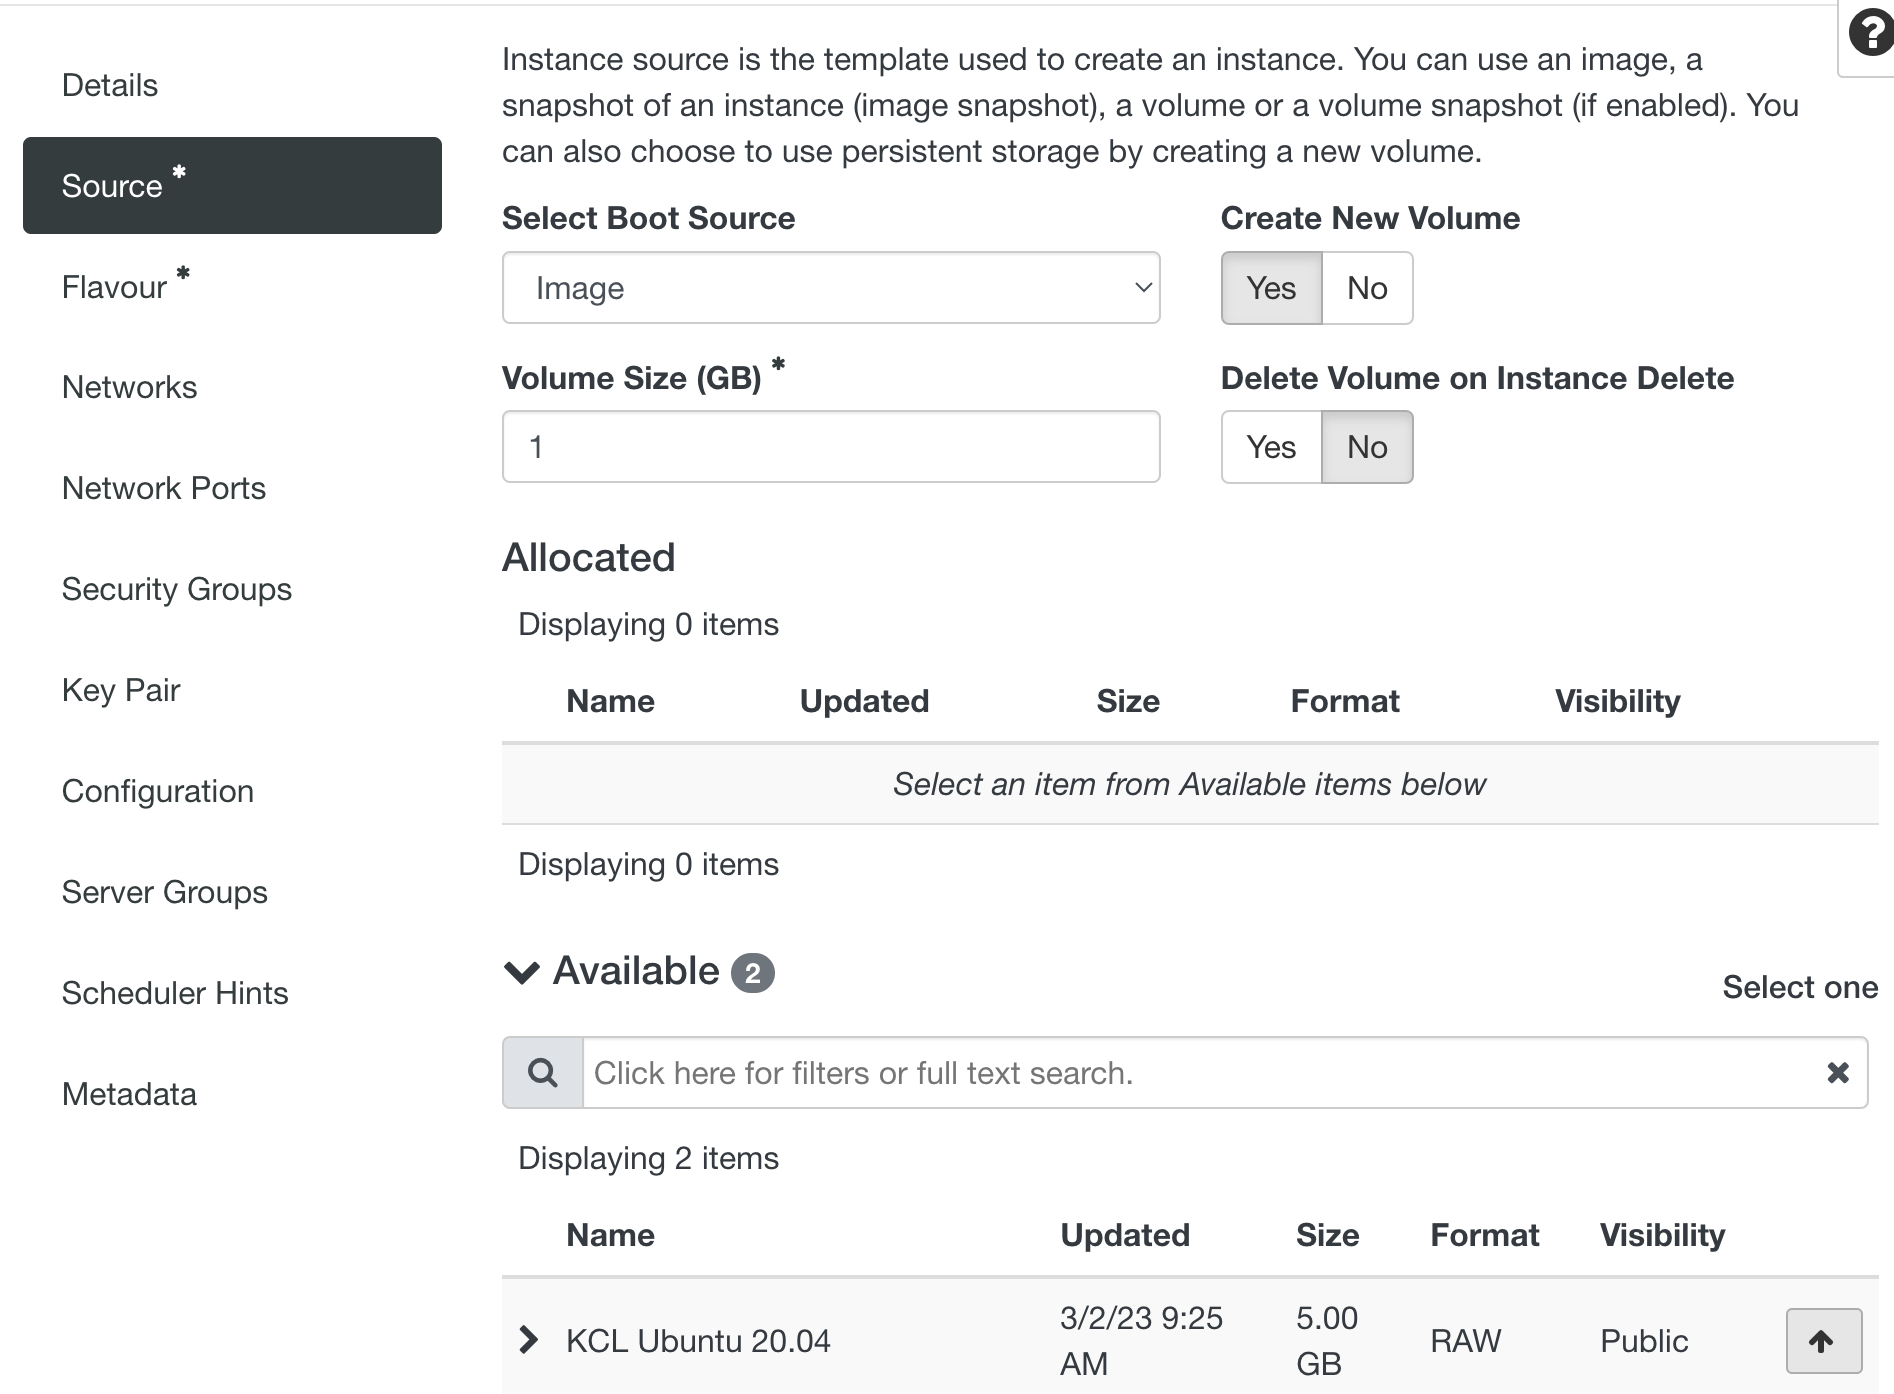
Upon selection of an Available Source the minimum volume size of 10GB will be automatically populated. Our flavours all have a disk size of 10GB. The general expectation is that research data is stored on RDS. If your application requires a larger disk size adjust the 'Volume Size' accordingly.
When creating VMs for the first time Select Boot Source will be left as the default choice 'Image'. It is also possible to create VMs from Volumes and Volume Snapshots (N.B. creation from Image Snapshots is disabled in our deployment).
Attention
We intentionally prevent the upload of user created VM images by default. This allows us to focus our support and security operations on our standard Ubuntu image. If your research requires another flavour of Linux/Unix please email support@er.kcl.ac.uk to discuss your requirement further.
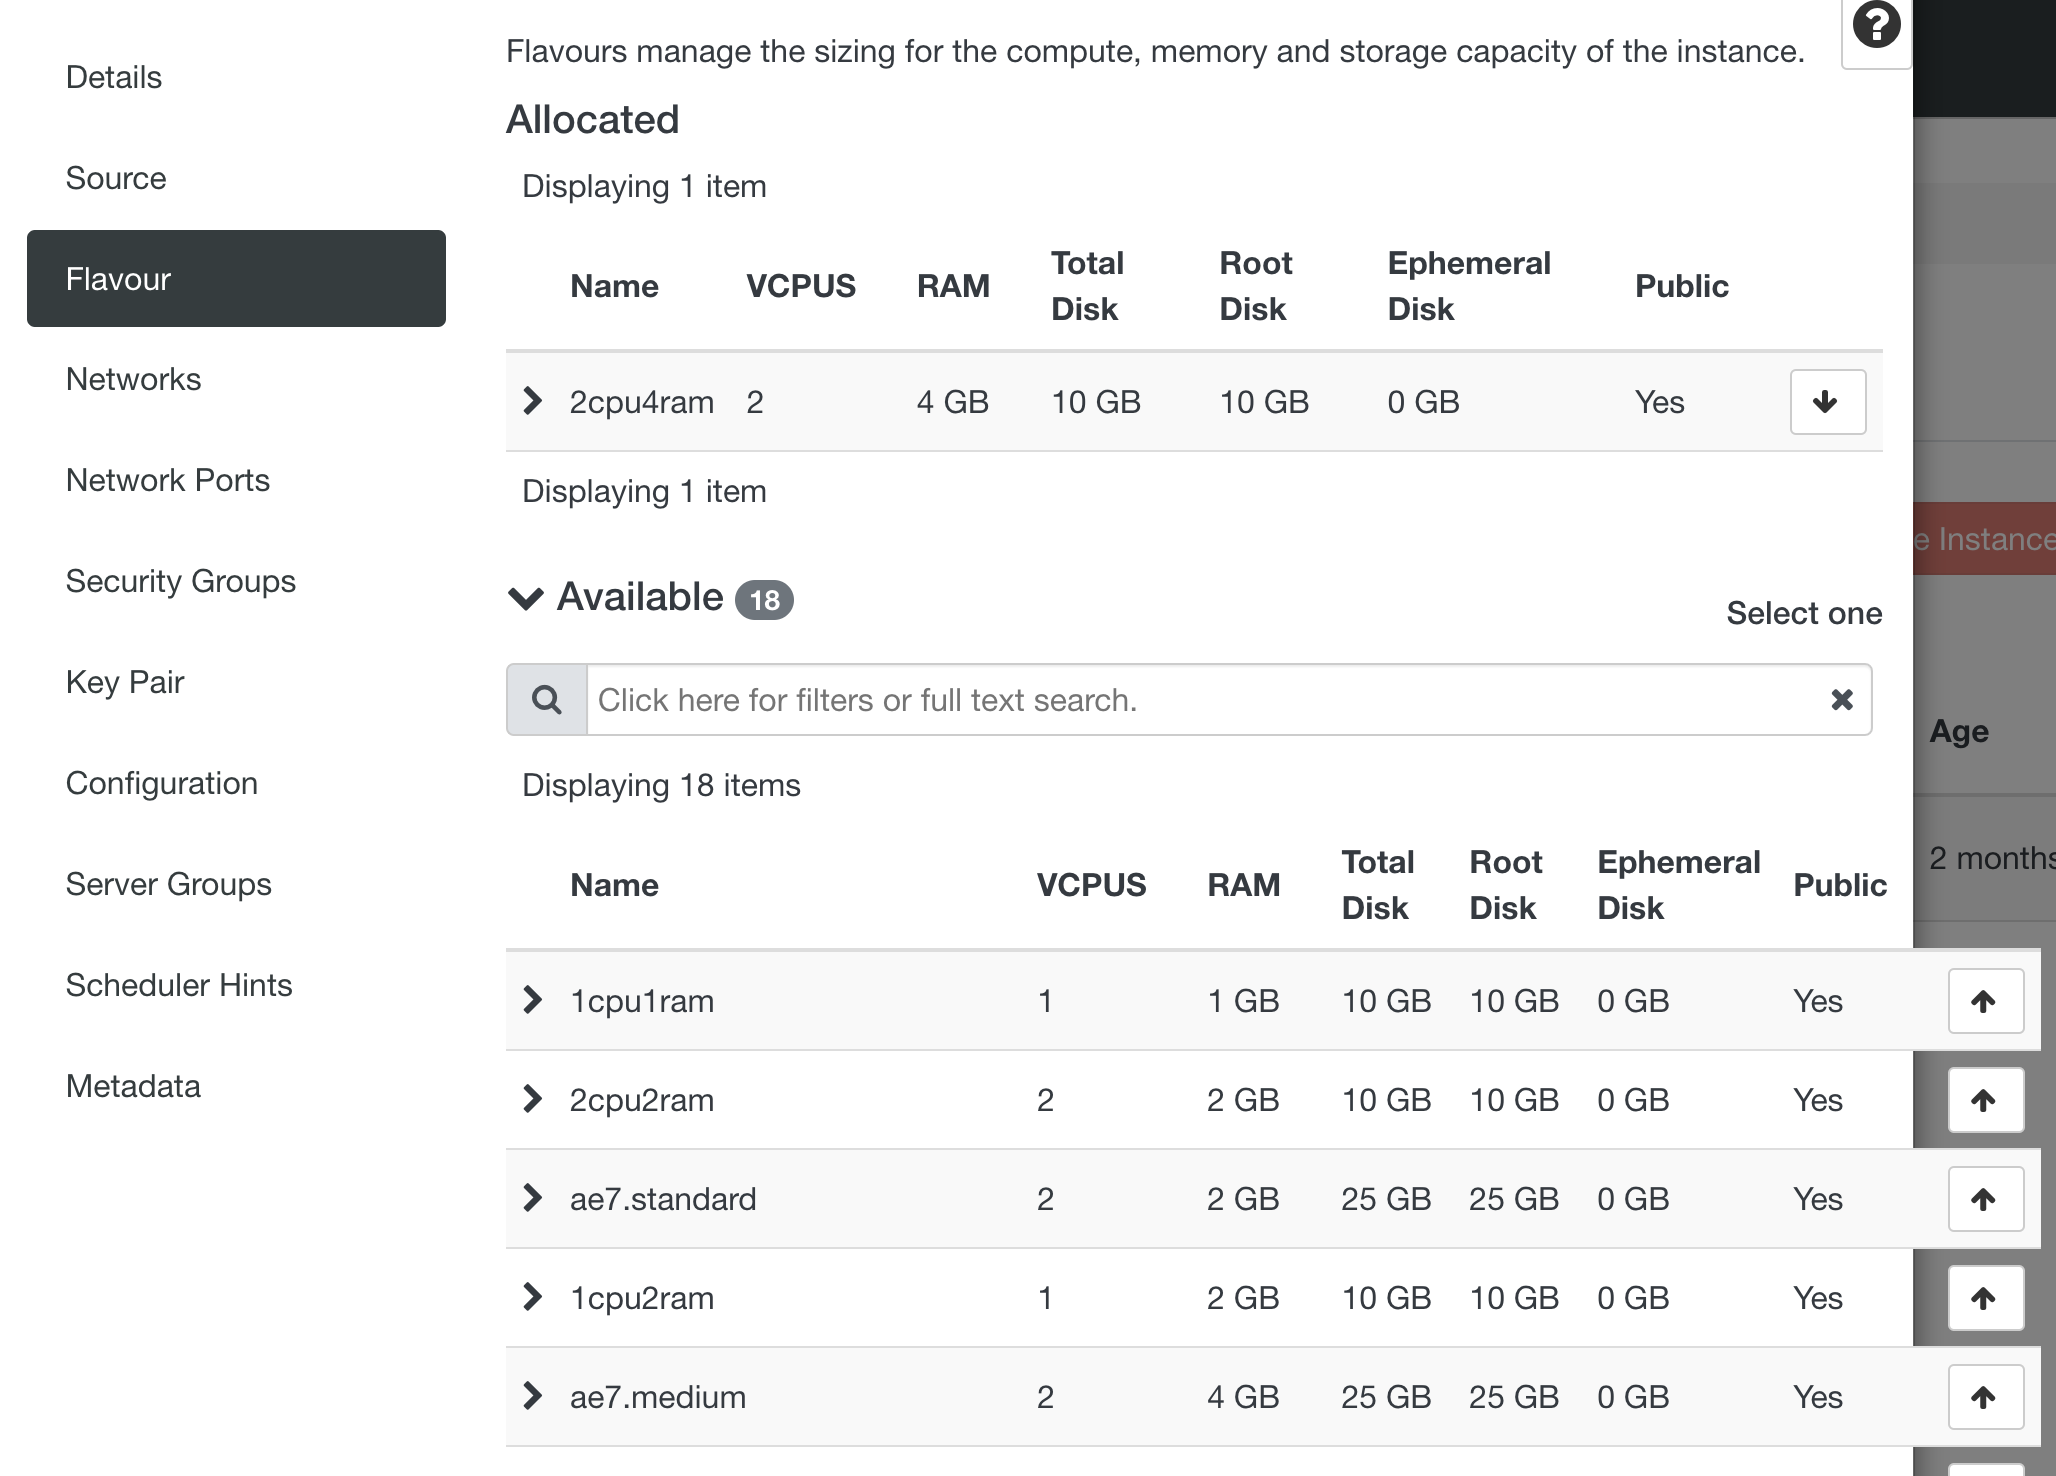
Flavour
Attention
The flavours prefixed "ae7" are deprecated and selecting these will result in failure to launch your instance. Please select the flavours which are named "cpuNramN".
The 'Flavour' refers to the different hardware configurations available and you should select the one most appropriate for your needs. A flavour defines the amount of vCPU and memory an instance will have. The choice of flavours may be restricted by the particular type of image chosen or the resources (e.g. GPUs) you have available in the project.
Flavours are Allocated by clicking the up arrow to the right of the required Flavour in the "Available" section.
Networks
The most basic approach to networking is to connect your instances to the 'external_4003' network directly. This will assign them an IP address in the 10.211.112.0/20 subnet which is then reachable over the e-Research VPN. For details on creating networks internal to your project see our tenant networking doc.
The 'external_4003' network is automatically selected in the Launch Instance wizard, click Next.
Network Ports
For a basic set up network ports do not need to be configured.
Security Groups
Attention
Do not select the er_ssh_from_bastions security group during this launch wizard, doing so will cause the instance launch to fail. It can be selected after launch (see below). We hope this will be addressed in an impending fix to the OpenStack Nova service.
Key Pair
It is possible to create a key pair in the Launch Instance dialogue window although if you have added / created a key pair already it will be available for selection.
Be sure to select a key pair as this will be required for SSH access to the VM.
Launch instance
You can now click the 'Launch instance' button. You will see your instance building and also the IP address in 10.211.112/20 that has been assigned.
Select the SSH Security Group
Attention
Security Groups control what traffic is allowed to access your VMs. Caution and understanding are required when making any changes to the defaults e-Research provide.
e-Research provide a number of automatically generated Security Groups to your projects when they are created. These are prefixed 'er_'.
Using the drop down in the instance's 'Actions' column choose 'Edit Security Groups'.
Select the 'er_ssh_from_bastions' Security Group to allow SSH traffic over the e-Research VPN.
Connect via SSH
Once the status shows as 'Active' and the er_ssh_from_bastions Security Group has been
assigned you should be able to connect via SSH using the account 'ubuntu' and the SSH key pair
you configured while connected to the e-Research VPN or via our SSH bastion
servers with the following SSH incantation:
1 | |
KCL Ubuntu 20.04 image
Our Ubuntu image is close to vanilla with a few notable customisations:
- We install an administrator account and SSH key so that we can access the instance to respond to any critical incidents
- We install a Wazuh security scanning agent so that we can monitor vulnerability exposure across CREATE
- We enable automatic patching (including required) reboots on a weekly basis
- We configure a password strength policy for local accounts (should they be needed, N.B. we recommend SSH keys instead wherever possible)
We expect these configurations to be left untouched in the majority of use cases while acknowledging that users may need to adjust automatic reboots to better suit their use case. Any changes to the above must not prevent compliance with our house rules.
Connect to RDS or HPC storage
Attention
It is generally expected that you use RDS to store all your research project data as it is backed up. Connecting with HPC scratch storage may be useful to integrate HPC processing with your OpenStack applications but all datasets and results should ultimately be moved to RDS for permanent storage.
First you will need to contact us to request an SMB role account associated with your project storage. Once requested you will receive the account name and password via an encrypted email.
Save these credentials in to the file /etc/smb_creds in the format below and restrict the permissions with sudo chmod 600 /etc/smb_creds.
1 2 3 | |
RDS mount details
Create the mount point with mkdir -p /rds/<RDS share name>.
Add the following line at the bottom of /etc/fstab:
1 | |
HPC scratch mount details
Create the mount point with mkdir -p /hpc/<HPC directory name>.
Add the following line at the bottom of /etc/fstab:
1 | |
n.b. <path to HPC directory> currently support /users or /scratch locations e.g.:
1 | |